Remember the African black soap article from just a few weeks ago? So many of you guys were interested in the process of making it so, I thought I would share this easy African black soap recipe for all of the do-it-yourselfers out there. Of course, you can always buy it from the store but isn't there just something a little special when it comes to homemade goodies?
I'm not an avid soap maker so, I am going to be using the simplest recipe I've found, which happens to be from wikihow. If you're just starting out in soap making bizz or curious about how to create your own African black soap, you'll find this recipe to be incredibly simple with only 10 steps to follow. Now, let's get started!
Ingredients You´ll Need:
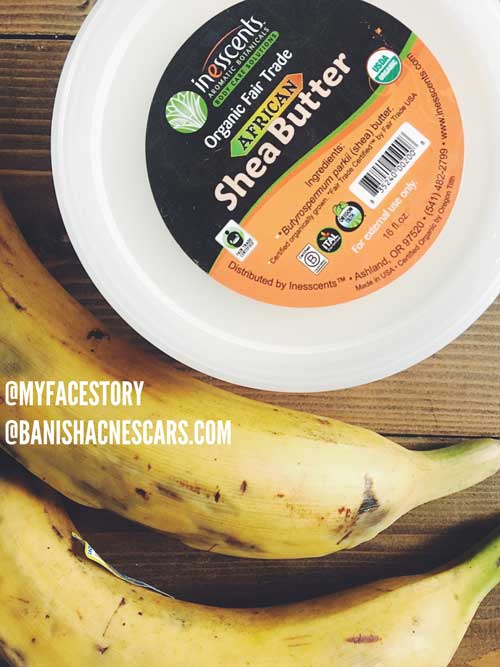
- Base oil: palm oil, shea butter, and cocoa butter are typically used in traditional African black soap
- Plantain skins (note: you can substitute the plantain skins with cocoa pods if they are readily available in your area)
- 2 cups of warm, distilled water
- Desired essential oils: tea tree, lavender, and clary sage all make great options for skin ailments like acne and eczema but feel free to use whichever you prefer (or none at all)!
Kitchen Utensils:
- Strainer
- Double broiler
- Large mixing bowl
- Mixing Spoon
- Mold
- Oven-safe bowl with tight-fitting lid OR baking sheet
Directions:
1. Select your base oil
For the purpose of this DIY, I will be using about 2 cups of shea butter. According to wikihow, the amount of base oil needed should not exceed half of the capacity of your double broiler. There are no exact measurements so I guess you just gotta eyeball it and hope for the best on this one!
2. Roast the plantain skins
Cut open the plantains, dispose of the insides and place the skins, skin side down, on a baking sheet or in an oven-safe bowl. Again, there is no specific temperature or measurement (thnx wikihow) so we are going to oven roast four plantain skins at 350 degrees until brown. The number of skins, cocoa pods, and alternate ingredients used will depend on how much soap you are making or how concentrated you want your soap to be.
3. Burn the plantain skins (or alternate ingredients)
Now we burn the plantain skins, so I guess roasting them for a long time isn't really all that important! Burn the plantain skins in the oven broiler fluctuating between 250 and 500 degrees. An oven-safe bowl with a tight-fitting lid is preferred here due to the likelihood of a fire. In case of a fire turn the stove OFF and cover the bowl with the tight-fitting lid (without oxygen the fire will die).
The ashes will be completely black all the way through once they are ready to use, you can crack them open and check the inside to be sure no brown is remaining. Plantain ash, when combined with water, creates a lye mixture. Lye is an alkaline solution of potassium hydroxide, typically used in products like soap or household cleaner for washing and cleansing.
4. Add the ashes to the water
Slowly add the ashes to 2 cups of warm distilled water while stirring. You can add more water or ashes to make the consistency as thick or dark as you'd like.
5. Boil the mixture
Bring the mixture to a boil and then lower the heat. Once the ashes have dissolved into the water you can strain the mixture and set the liquid aside. The potassium hydroxide from the plantain ashes should now be leached into the water.
6. Heat the base oil
Using a double broiler (or a glass bowl that fits snug in a pot) heat the base oil over low heat until it is completely melted.
7. Combine ingredients
Slowly stir in the ashy water to the melted base oil on low heat. Continue adding the ash liquid until you get your desired shade of brown or black and until the liquid is completely smooth. If desired add a scent or essential oil to the soap; traditional African black soap does not contain any additives but for my acne-prone and easily irritated skin I will be adding Lavender (for calming) and tea tree (for blemish-fighting).
8. Remove the liquid soap
As you stir, you will notice that a waxy material begins to form on top of the liquid substance. This material is the soap and can be easily scooped from the broiler into a mold. Continue scooping the soap from the surface into the molds as it forms. Eventually, almost all of the water should evaporate off.
9. Cure the soap
Leave the soap in the molds for up to two weeks to cure, this will be enough time for the soap to become solid. While the soap is curing it should be stored in a cool, dry place with ventilation. Curing happens as most of the water evaporates out of the soap.
10. The soap is ready for use!
Once the soap is firm but malleable it is completely cured and ready for use! Use as a face wash, body wash, create your own African black soap shampoo, or turn it into a creative holiday gift!
Although it is a bit of a process, if you are making African black soap yourself then you choose exactly the quality and kind of ingredients that you want to put into it; you can make the batch as big or as small as you want and have total control over the quality. For a visual step by step demonstration (and to find out if this recipe actually works or not) watch the DIY African black soap video above! Comment below if you tried out this recipe & how it worked for you!









3 comments
Chidimma
Good one. I will love to try it.
Tres
So did it turn out?
Michael
Nice one,
Leave a comment
All comments are moderated before being published.
This site is protected by hCaptcha and the hCaptcha Privacy Policy and Terms of Service apply.